


Hello everyone! Why do I always find myself writing DIY posts at the last minute with bad, unedited photos? We may never know. Today's Blogtober prompt was to share a DIY you did. Yesterday, I made a little leaf hanger string thing for my room so I decided to share that with you :) Enjoy!
Have a wonderful rest of your day and I'll talk to you tomorrow in the next day of Blogtober when I do the Halloween tag! If you want to check out the questions here.
Thanks for reading,
Noor

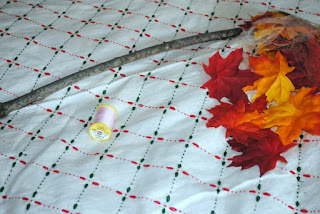
You Will Need
-Some leaves (mine are fake but you can always dry real leaves)
-Thread
-A fairly long, thickish stick
-Yarn (not shown)
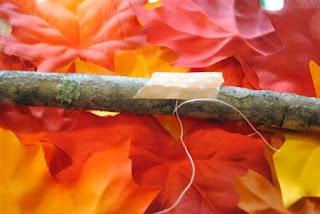
Step 1
The first step is to attach your thread onto your stick. What I did was tie the thread around and knot it twice. To secure, I stuck a piece of tape so it wouldn't move around. Then cut to your desired length. Add around 4-6 of these. (it depends on how long your stick is)

Step 2
The next step is to attach your leaves to your string. You can do this many ways: using tape, glue, hot glue, Mod Podge, stapling. Really any way. My leaves were very uncooperative and regular glue and tape did not work. So I had to resort to hot glue. I put around 3-4 leaves on each string but again, it depends on how long your string is.
My best advice is that if it works, clear tape and glue is the best way to go because it looks the neatest. I have a bunch of hot glue globs on the back of my leaves, not very attractive.
(I thought this step was pretty self explanatory so I did not include a picture, and also my picture sucked)
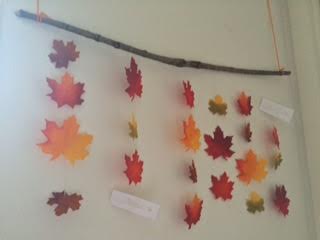
Step 3
Now you're ready to put it up! Once again, this can be done many ways but I chose to do it a simple way. I took 2 pieces of yarn the same length, tied it to the stick and taped the ends of those to my wall. Very simple, yet effective.
Step 4
This is completely optional but I thought it would be cute and a nice personal touch to attach some pictures or quotes onto the strings. I added a little 'hello fall' and 'autumn <3' sign to mine to fill up the space :P But I thought that some Polaroids or like little pictures would be really nice to put on there!
Step 5
Admire your work! You have now created a very fallish décor piece that took less than half an hour! Pat yourself on the back, take a few pictures! (Hopefully they turn out better than mine)
I used my phone for these as my camera would not cooperate with me -.-'
I hope you guys enjoyed that little DIY and if you do it, let me know how it went! Also, if you do a DIY post for Blogtober today, link it up down below :DHave a wonderful rest of your day and I'll talk to you tomorrow in the next day of Blogtober when I do the Halloween tag! If you want to check out the questions here.
Thanks for reading,
Noor
Cool DIY
ReplyDeleteThis comment has been removed by the author.
DeleteThanks Nabila, glad you like it :)
DeleteI might have just now noticed that I put my link up there for not a DIY. Is it possible for you to delete it?
DeleteYour so creative!
ReplyDeleteAw thank you Tara, that means a lot!
DeleteAh, SO PRETTY!!! I am insanely jealous of you because there is no autumn / maple trees in my country, and getting leaves, even artificial ones, are HARD. I love your creativity! :D
ReplyDeleteRanu @ The Araliya Bookshelf
This is such a cute DIY! Thank you for sharing ♥
ReplyDeleteAmy xx
Little Moon Dragon